Summary
The following page will go over how to flash your voxelab aquila with custom firmware allowing you to get the most out of your 3d printer.
Assumptions
- You have a Windows device (Similar for other operating systems).
- Available SD card.
- You have an Voxelab Aquila
Contents
Useful Links
- Custom Firmware - Video Tutorial 1
- Stock Firmware - Video Tutorial 2
Flashing Your Printer
Preparation
Important Sticky Note to read before starting here 3
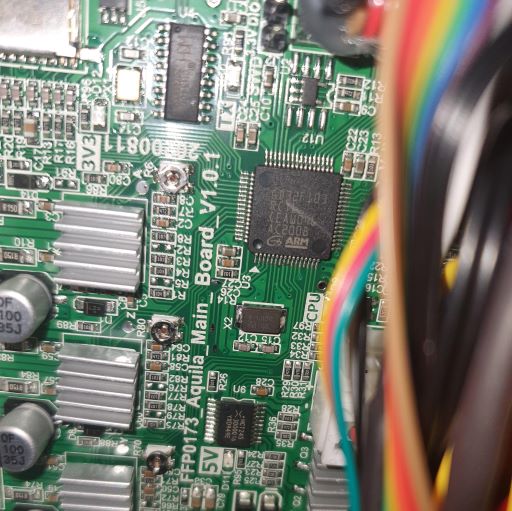
Determine Which Firmware Your Printer Requires. (G32 or N32)
Explanation here
-
Simple method Confirm whether you printer has a sticker on it with the model of chip.
 If your printer does not have a sticker, it is most likely the G32 or N32
 -
Effort Required Open the bottom of your printer and confirm by looking at the model number on the chip.

Download Custom Firmware
- Download the .bin file for your device version from Custom Firmware
Types of version
-
Bed Leveling Type BLTouch: Auto Bed Leveling. Default: No Auto Bed Leveling. Manual Mesh: Manual Bed Leveling, configure your own mesh. UBL: Unified Bed Leveling.
-
Mesh Size 3x3: 3 points by 3 points mesh. 4x4: 4 points by 4 points mesh. and so on..
-
Chip Model G32 or N32: Determined earlier
-
Also download the source code .zip file as well.
Format the SD Card
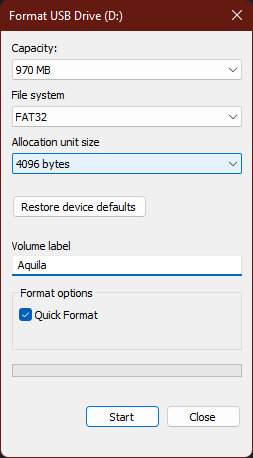
Open up windows explorer and format your SD card with the following settings
- Capacity : Doesn’t matter dependent on SD card size.
- File System : FAT32
- Allocation Unit Size : 4096 Bytes
- Volume Name : Whatever you want!
- Quick Format : Checked

Preparing for Flashing
- Extract the source code zip file.
- Go into the path “/Display Firmware/Firmware Sets”. The folder set you can now see are basically the theme for the display. Pick one you like, copy it to your desktop and then rename it to just “DWIN_SET” (All capitals).
- Now for the .bin file you downloaded earlier, Make a new folder and name it “firmware” (All lowercase) and move it inside.
- Move both folders “firmware” and “DWIN_SET” to your freshly formatted SD Card. End result should look something like this

Flashing the Motherboard
- Make sure printer is off.
- Place SD card into Machine
- Turn on the printer
- Watch the screen and look for a loading bar. It will give you a check mark once complete. The screen will look really messy after flashing the mobo, this is normal as we haven’t flashed the display yet.
Flashing the Display
- Make sure the printer is off.
- Remove the screen and the screws from the back.
- Open up the screen and remove the ribbon cable.
- Place the SD card in the back of the screen.
- Plug the ribbon cable back in.
- Turn the printer back on and wait for the screen to flash blue and then orange.
- Once showing orange we can put everything back to normal and we now have the new firmware.
Firmware Upgrade Complete!